As we all know very well that every person has privacy, if we are in office then we have lots of documents that we don't want to share with employees and other company members. Or many times there comes few documents that we want to make them private so that no one can modify or remove our important fields. So the question is that how we can protect our files. Stay tuned with me because I am going to explain how to password protect Excel, 2016, 2013, 2010, 2003 and 97. Here in one post you will find password protection steps for all type of Excel sheets. Have a look on few solutions: how to password protect Excel.
Solution 1: How to Password Protect Excel 2016
Friends if you are using Excel 2016 then this solution is for you to Excel password protect.
Step 1: To protect your important Excel 2016 file, you need to open "File" menu.
Step 2: You need to choose the "Info" tab.
Step 3: After choosing Info you need to choose the "Protect".
Step 4. When you click on "Protect Workbook". There you will be able to see few options, here you need to choose "Encypt with Password".
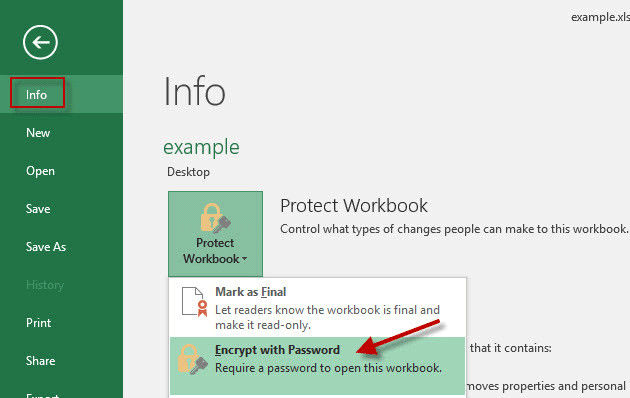
Step 5: After that a dialogue box will come, there you need to enter your password that you want to use to secure your Excel 2016.
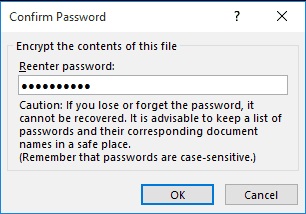
Step 6: Then you need to enter the password again just to confirm after that just press OK.
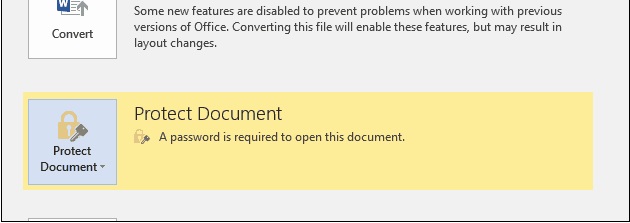
Now you will be able to see that your file is protected. Every time when you will try to open that file first you need to enter password then you will be able to open it. Hope you like this solution and continue to read below if you want to know how to password protect an Excel file of 2013, 2010, 2003 and 97.
Solution 2: How to Password Protect Excel 2013
Looking for Excel password protect file? Continue to read below.
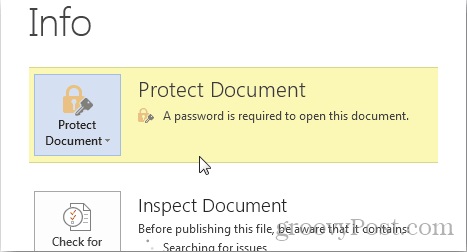
Step 1: For this you need to first click on "FILE".

Step 2: Then will be to find an “INFO” tab here choose “PROTECT DOCUMENT”.

Step 3: In 3rd step choose “ENCRYPT WITH PASSWORD”.

Step 4: A dialogue box will appear just type password that you want to use to open excel file and then confirm your password after that you will be able to see that your Excel 2013 file is protected.
Solution 3: How to Password Protect Excel 2010
Step 1: click on “REVIEW” tab.

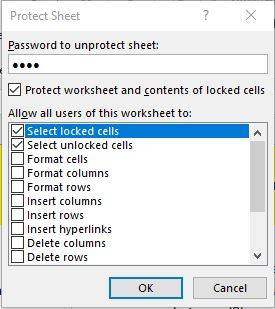
Step 2: click on “PROTECT SHEET” here a dialogue box appear where you need to enable those options for which you want users to perform actions. After that, type your password to protect file and choose Ok tab. In such a way Excel file 2010 will be protected.
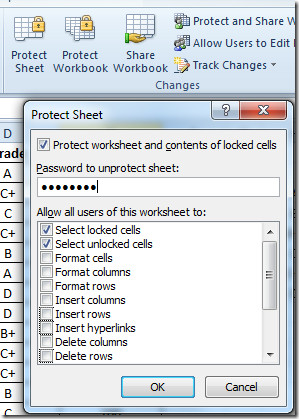
Step 3. When any one tries to modify your sheet then he first need to unprotect the sheet by choosing “UNPROTECT SHEET” tab.
Solution 4: How to Password Protect Excel 2007, 2003 and 97
Continue to use these steps to protect file.
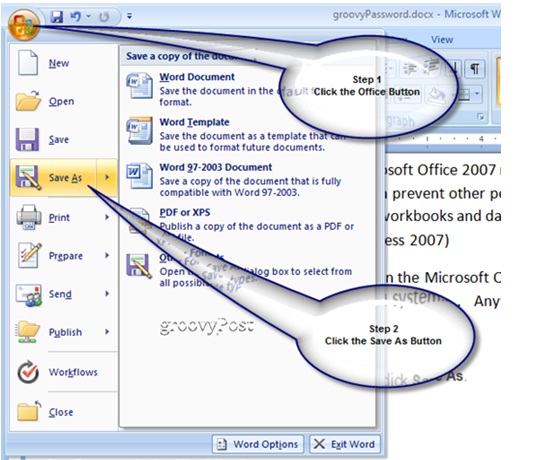
Step 1: you need to open “MICROSOFT OFFICE” Button
Step 2: In second step choose “SAVE as”. You can see step by step in the picture below.
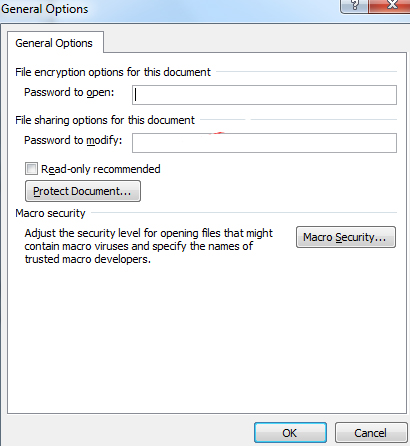
Step 3: In 3rd step you need to open tools and choose general options.

Step 4. Here you will able to find two options, first one is “Password to open” Second one is “Password to modify” you just need to type password in “Password to open”
Step 5. Field and then choose Ok after this make sure to save file.
Step 6. Now you can see your file is password protected
Extra Tip: How to Unprotect Excel Password
I am going to give you an extra tip to recover forgotten Excel password. Have a look on amazing tool that will help you to unlock password. PassFab for Excel is easy to use you can easily recover or reset passwords for all types of files. So why not to take benefit from such an amazing tool? You can download this amazing tool from here:
How to use PassFab for Excel to recover Excel password protect file? Follow few steps and get back your lost password.
Stage 1: In first step you need to open this Excel password recovery software.

Stage 2: You need to import your protected file by pressing Add button.
Stage 3: In 3rd step you need to select password crack type.
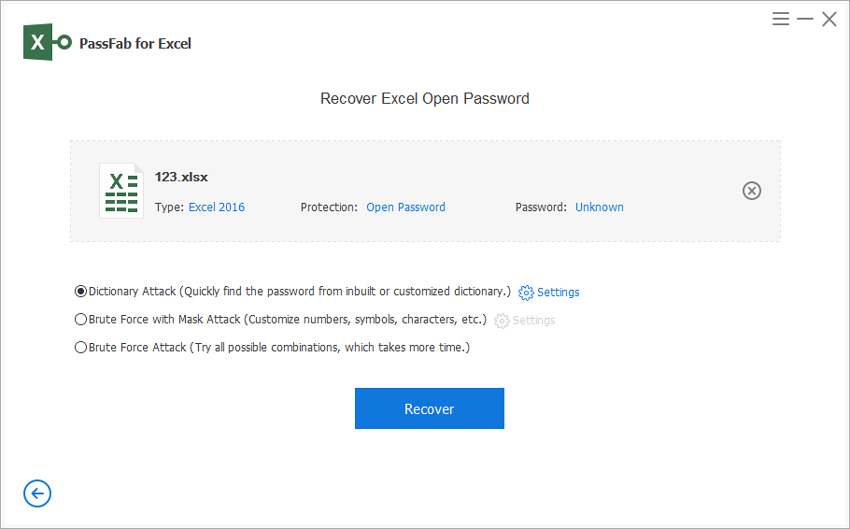
And by using password recovery option you can recover password of protected file. But this option will takes you to choose one type from three attack types of password recovery. It will be up to you to choose any type of mode.
1st mode is Dictionary Attack:
You can choose this mode if you are looking for lost password quickly, for this you need to download latest dictionary or you can even add your own dictionary.
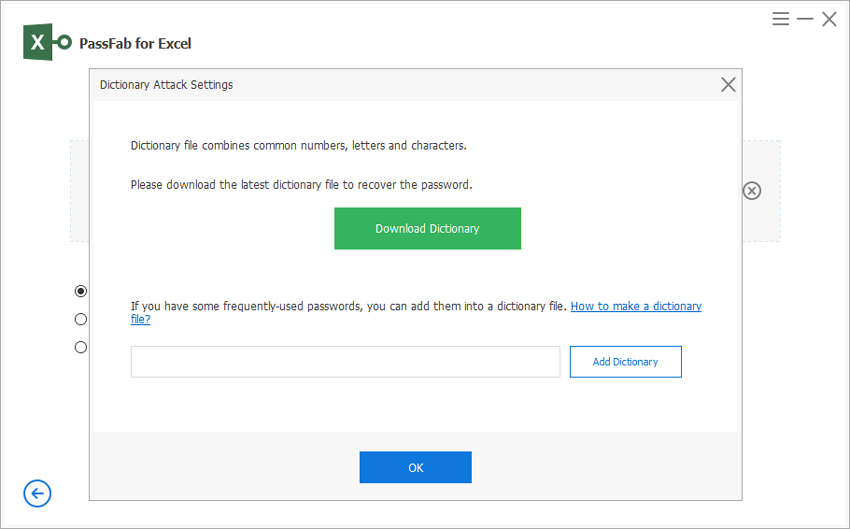
2nd mode is Brute Force with Mask Attack:
You can choose this mode to boost up password cracking process with the help of customization.
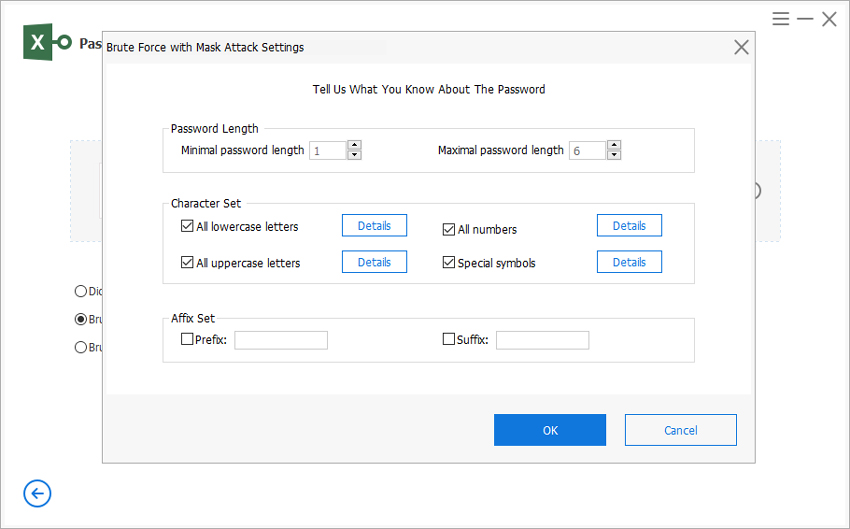
3rd mode is Brute Force Attack:
You can use this mode if you have more time because this one is the combination of all modes. But this one can be used by those who have more time.
Stage 4: After the selection of any mode you can click on start button. If yours PC or Laptop supports GPU, then don’t forget to select GPU Acceleration before clicking on Start button.

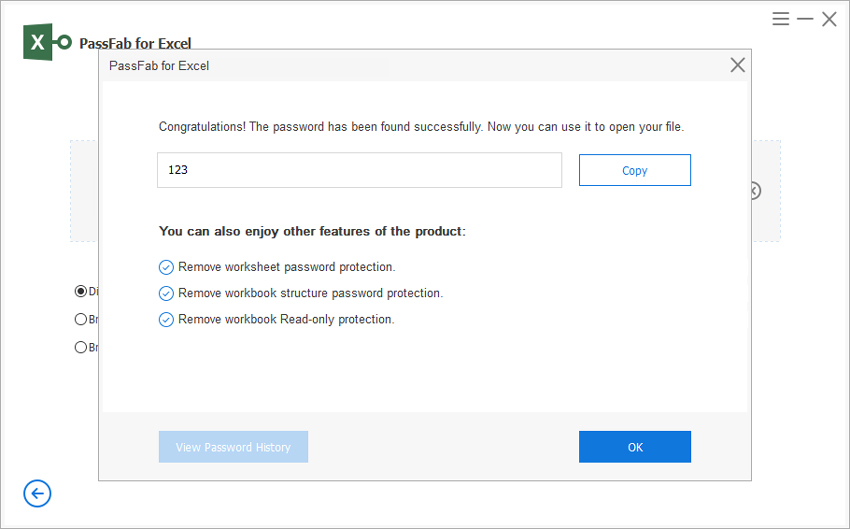
After that you will be able to find a dialogue box where you can see your password to unprotect the sheet.
Summary
Hope you like solutions on how to password protect an Excel file. If you are looking for fast method to open your protected sheet without password then don't forget to use above mentioned software. Stay tuned with us and don't forget to share this precious info with your friends. Share this at twitter as well as Facebook. If you have anything to ask regarding Excel password, then don't hesitate just type your question in the comment box we are here to let you know.